Twitter
RSS

I'm Back & Demonoid registration open now

2
Hi guys..
It's been a long time im writing blog posts. I went to a job and was not able to blog at all.
This post is to tell u guys that the registration for www.demonoid.com is open now.
so rush rush rush ...
Remember, the registration for demonoid.com is open for a short time only.So be quick and make use of it.

Creating Lens effect in photoshop from scratch - Tutorial

11
In this tutorial we are going to create a magnifying glass effect when seen through a plastic lens. Plastic lens can be created using 'plastic wrap' filter and lens effect is given using spherize filter in photoshop. The steps are,

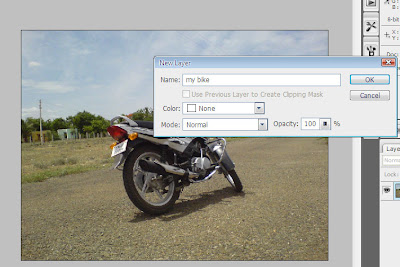
1. Open some picture in photoshop like shown below and make it a layer by double clicking on it and give it a name.


2. To make things safe, make a duplicate of that layer so that we can work on this layer later.

3. Now we are going to create a plastic lens in the coming steps. Make a new layer above the second layer.

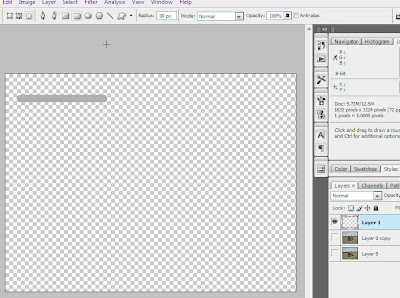
4.Now keeping the new layer active, select rounded rectangle tool in 'fill' mode with a radius of around 30 and foreground color as gray(i have choosen #b1b1b1), draw a rounded rectangle like shown in the picture. ( i have hidden the two image layers below to make it more visible)


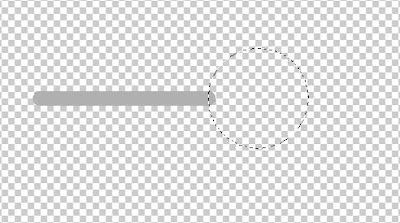
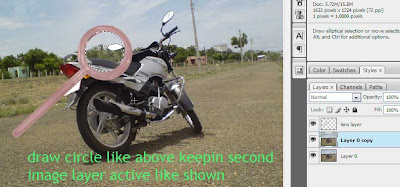
5. Next create a new layer above (name it as lens layer) and use elliptical marquee tool to draw a circle (hold shift after started drawing to make it a circle and hold 'spacebar' and move using move to adjust its position ) like shown below.


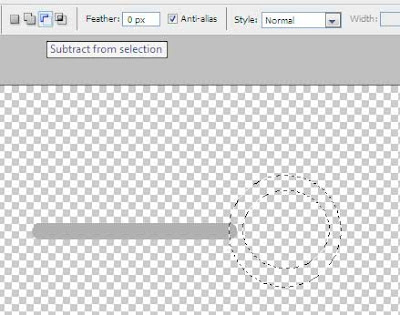
6. Now we have to draw a inner circle within this. So using the same elliptical marquee tool, hold 'alt' (or select 'subtract from selection' mode in options bar above) and draw an inner circle like shown below .


7. Keeping this selection active, fill this circle with that same gray foreground color used before (in my case it is #b1b1b1).


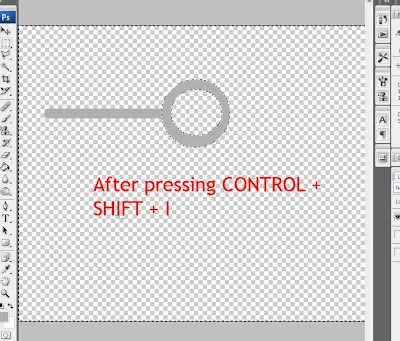
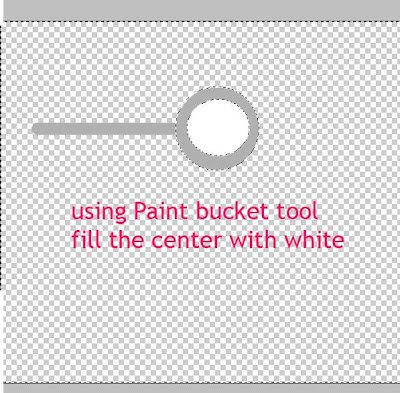
8.Keeping the selection active, press 'CONTROL + SHIFT + I ' to invert the selection and fill the center part of the lens with white color(#ffffff) like shown below.


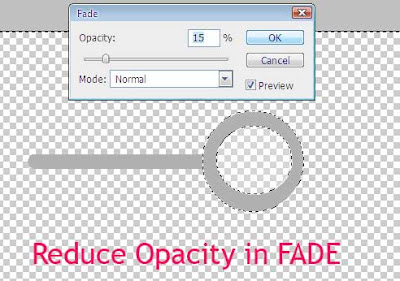
9.Immediately after filling with white, without doing anything, just go to 'Edit --> Fade Paint Bucket Tool ' and set the opacity level to around 15 percent like shown below


This fading is to achieve that transparency effect in lens.


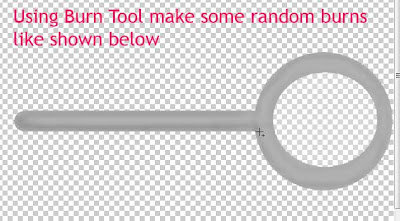
10. After deselecting the previous selections, using 'Burn tool', make some burns in the lens we have created like shown below.


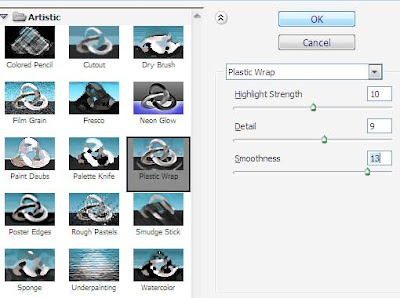
11. Now select 'Filter --> Artistic --> Plastic Wrap' in the menu bar and use the settings like shown below.

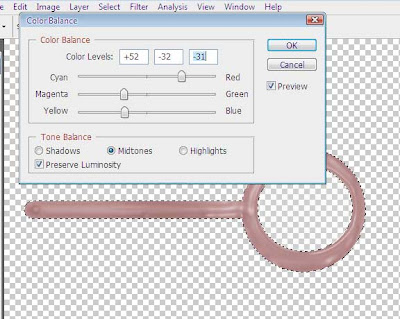
I have changed the color of this plastic lens using 'color balance' palette like shown below.


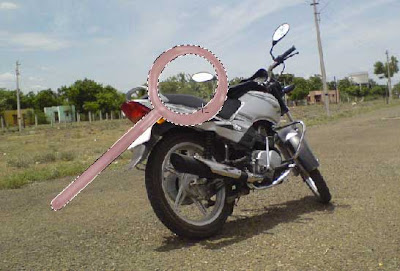
12. Thus we have a plastic lens ready now,turn on the visibility of background image layer and rotated lens using free transform like shown below.


13. This step is somewhat tricky to do.. Making the bike image below lens layer as active, select elliptical marquee tool (in new selection mode) and draw a circle slightly below the inner white part of lens. After doing this, the inner part of lens will get selected. These are explained in steps below


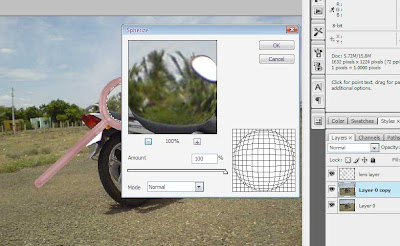
14. Keeping this selection active, the next step is to apply magnification effect using spherize filter. Select 'Filter --> Distort --> Spherize '


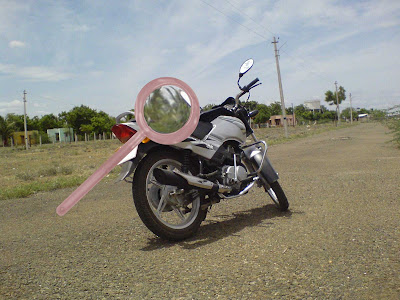
15.Thus we got magnified effect. We can increase the magnification by applyin spherize keeping the inner selection active. I have applied it second time with a 'Amount' value of 5 and got the picture like shown below.


And thus we created a plastic lens from scratch and created a magnifying glass effect using photoshop.

Turning Silver to Gold in a simple way - Photoshop Tutorial

11
In the medieval times, turning silver to gold was the ultimate aim of many alchemists... :)
Using photoshop we can turn silver to gold in simple steps. 
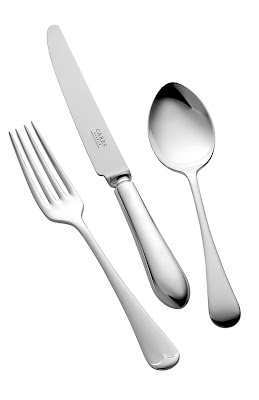
Today we are going to convert these silver bowls into gold ones using curves in photoshop.

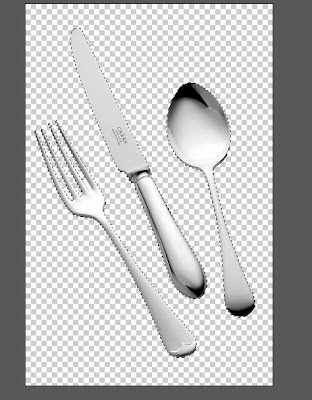
1. The image i have taken is shown below, thanks to http://www.silvergroves.co.uk

2. We are going to convert silver portion to gold and we do not need the white background.

3. You can delete the background using any selection tool . I have used 'magic eraser tool' with a tolerence value of '1'. 

Then click on the white background with magic eraser, so that all the white background outside the spoons is deleted.
(As the background image is white and silver is nearer to white, a low tolerence value as low as '1' helped me to remove only white color and not the spoon color.)

The selected silver spoons with white background removed are shown below.

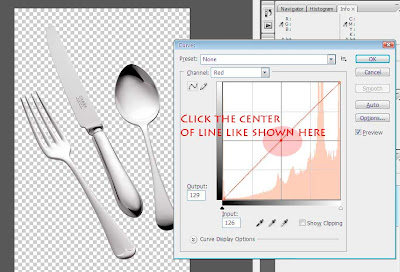
4. Now open the curves dialog box by going through Image --> Adjustments --> curves (or) by pressing its keyboard shortcut 'Control + M' .


5. In the curves dialog box, choose channel as "red' and click the the center of the line as shown below.
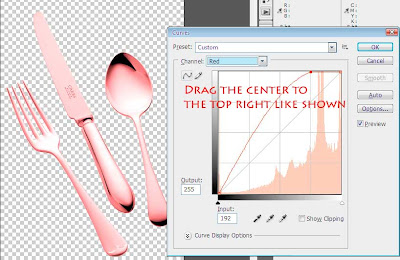
6. After clicking the center, drag the center to the ' top right ' like shown in the figure.


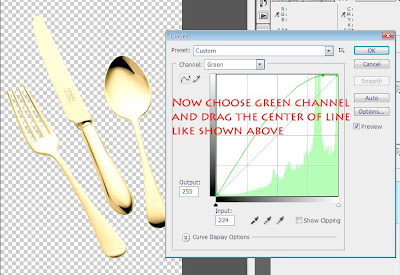
7. Then choose green channel in the same curves pallete and drag the center of the line to 'top 
right' nearer to extreme top right like shown in the picture below.


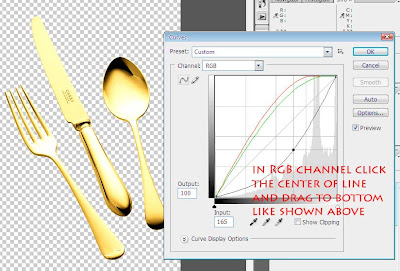
8. Now we got gold color, but its somewhat brighter. So go to RGB channel and click and drag 
the center to the bottom like shown in this figure.

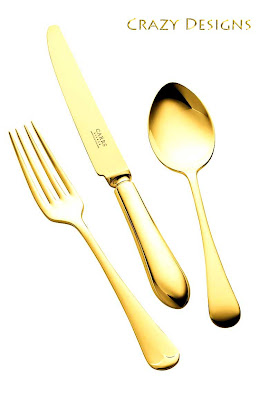
After adding a white background it looks like this..
And so we got gold spoons easily from silver spoons using curves pallete in photoshop. :)


Making Glossy Stylish Buttons using Photoshop - Tutorial

8
In this tutorial we are going to create glossy stylish buttons using photoshop. The tutorial is given with lots of illustrations to help you get through.
1.Create a new document with any size (i choose 250*250 pixels) with white background. Press Alt and double click the background layer.

2.Create a new layer from "Layer --> New --> Layer" from the menu bar and use rectangle tool(in fill pixels mode) to create a rectangle shape like shown below
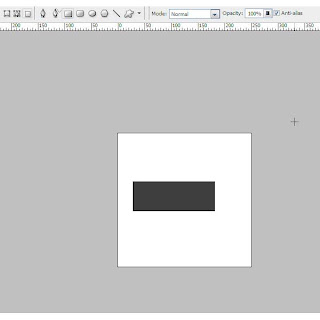
3.Now press control and click on the rectangle layer(layer 1) in layers Pallete to select the rectangle we have created.

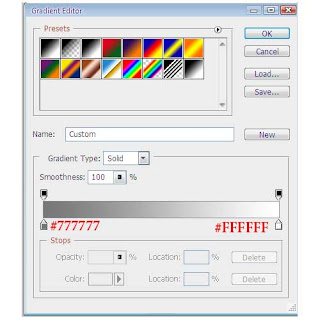
4.With the selection active, press "G" to open gradient tool and and change the colors in the gradient editor as shown from the picture below.
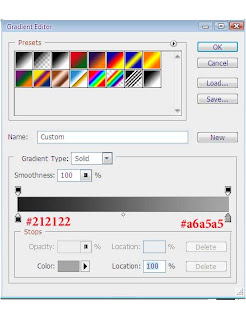
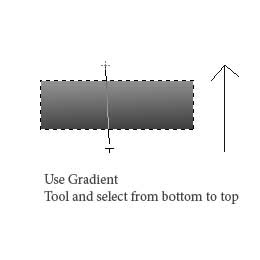

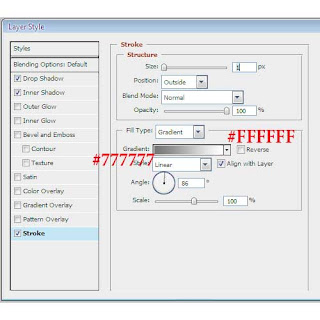
5. Now open blending properties of "layer 1" and change the values of "Drop Shadow", "Inner Shadow" and "Stroke" values like shown in the pictures below.
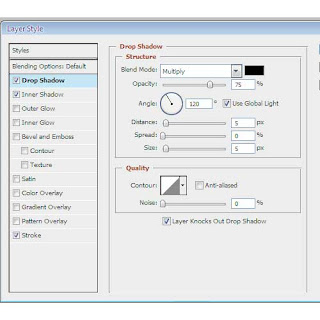
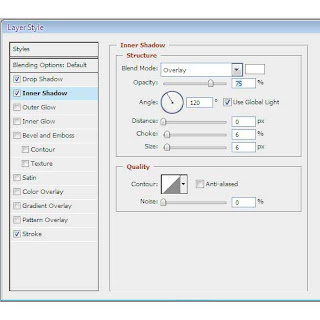
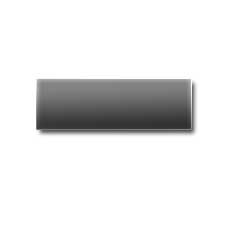
After doing the above steps we will get something like this.
6.Now we are going to add the glossy effect in steps. For that press control and click "layer 1" .Then select elliptical marquee tool and by pressing Alt subtract the bottom areas of selection, so that we are left with top area of selection. This is shown below.
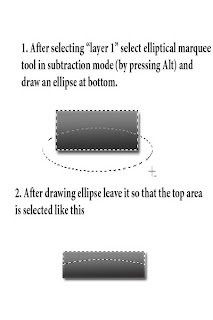
7.With the top selection as such, make a new layer(Shift + Control + Alt + N)

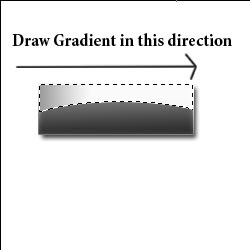
8.Press "G" to select Gradient tool and then draw a gradient as shown in the picture below

9. Now we will get the button like shown below
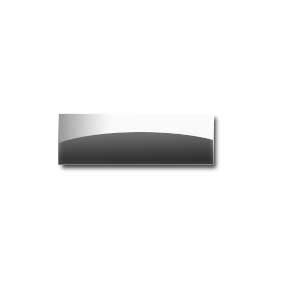
10. Now change the layer's blend mode to overlay and reduce the opacity to around 33%. The button will look something like this.
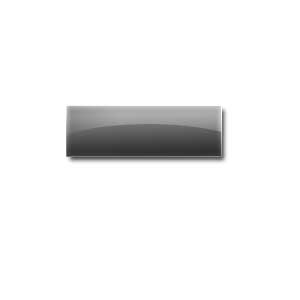
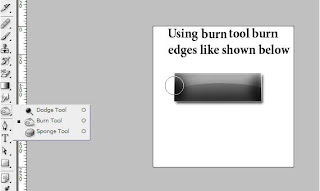
11. Now to add some extra touches using burn tool. For this, keeping the bottom layer(layer1) selected add some burning effects at the sides like shown in the picture below.

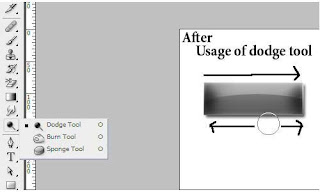
12. Similarly using dodge tool soften the top and bottom edges of the button like shown below

13. Now let us add some extra effects. MAke a new layer and take the pencil tool with green color(#46e859) with diameter "1". Draw two vertical straight lines(by pressing shift) along the left and right edges.It will look like this
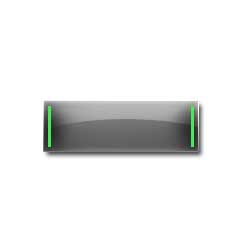
14. Now change this layer's blending properties like shown in the picture below.
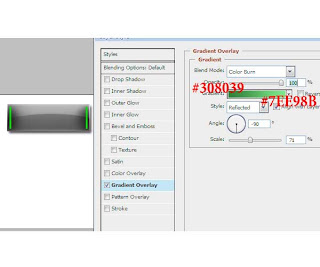
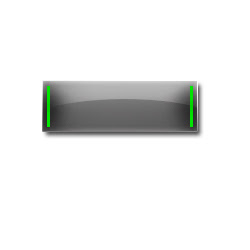
15. After changing the layer's blend mode to "vivid light" our glossy button is ready and it looks like this
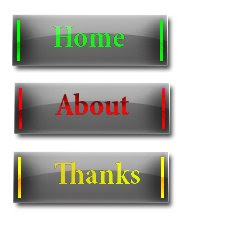
16.Lets write some text in that button so that it looks like
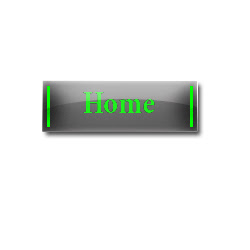
Similarly some buttons are created and shown below


Simple Steps to make an Old Paper in Photoshop Tutorial

5
This is my first design post in which i'm going to show you how to create a old paper in photoshop. The tutorial is given is an easy way  with lot of illustrations so that everybody can understand.
The final design will look like this.


The steps are as follows,

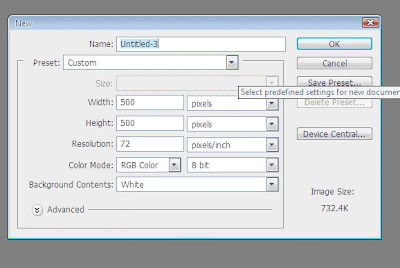
1. Create a new document of size 500*500 pixels (you can choose any size) in photoshop.

2. Press Alt and double click on the background layer to make it a normal layer.

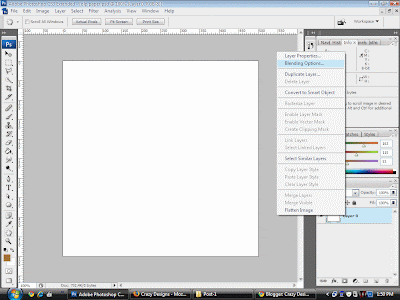
3. Now double click again on this "layer 0" to open its blending properties (or) right click the layer 0 and open blending properties.


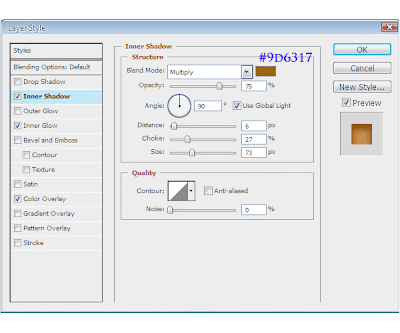
4. In blending properties open "Inner Shadow" tab and change the values as shown in the picture below.
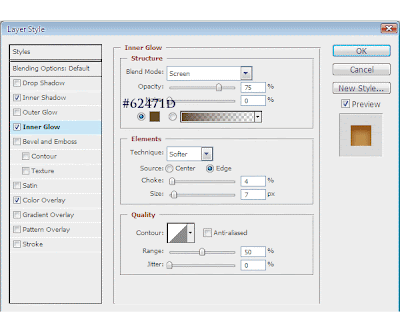
5. Then open "Inner glow" tab in blending properties and change the values as shown in the picture below.
6. Next open "Color Overlay" tab in blending properties and change the values as shown in the picutre below and press ok to save the properties we have just applied.
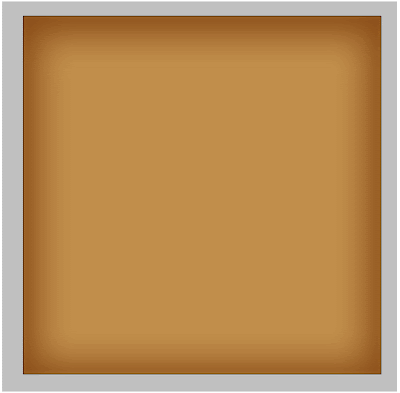
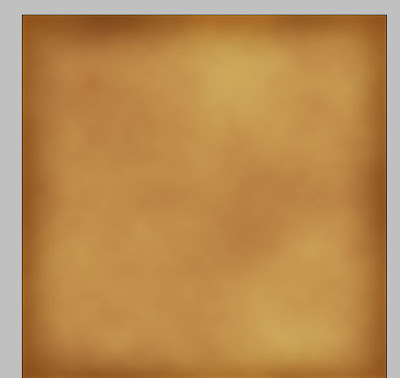
7. The screenshot of our work will look like this.

8. Create a new layer (Control+Shift+Alt+N) above this "layer 0".

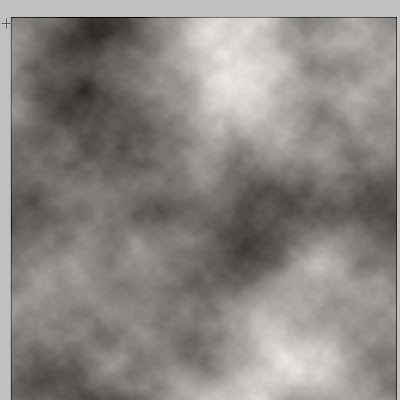
9. Press "D" to reset the colors to default state and press "Filter --> Render --> Clouds " in the "
"menu bar" keeping "layer 1" active.

10. You will get something like this.

11. Dont be panic and just change the blend layers in the layers pallete to "overlay" and change the transparency to 28%. Our work will look something like this.

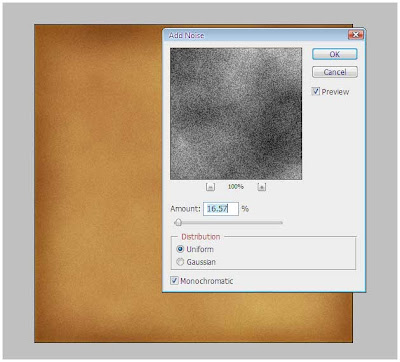
12. Then add some amount of noise by selecting "Filter --> Noise --> Add Noise" in the menu bar and change the noise amount to 16% as shown in the figure below.

13. Next add some texture by using "Filter --> Texture --> Texturizer" and select a low value for "relief" (i choose 4).

14. The old paper is almost ready. Now merge both "layer 0" and "layer 1".

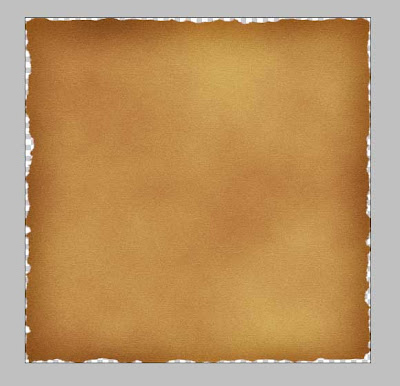
15. The paper seems neat in the edges. I used an eraser and erased some part of the edges so that it looked like this.


16. Then i added some designs in it to finish the design. The final output is something like this.


Look like an old paper? :-)  Expecting your comments!

Protected by Copyscape Duplicate Content Protection Tool
Related Posts Plugin for WordPress, Blogger...