

In this tutorial we are going to create a magnifying glass effect when seen through a plastic lens. Plastic lens can be created using 'plastic wrap' filter and lens effect is given using spherize filter in photoshop. The steps are,
1. Open some picture in photoshop like shown below and make it a layer by double clicking on it and give it a name.
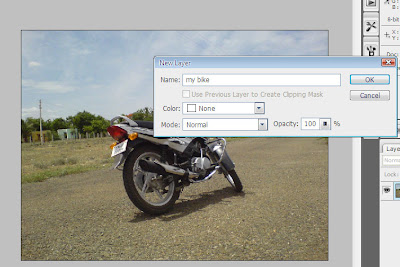
2. To make things safe, make a duplicate of that layer so that we can work on this layer later.
3. Now we are going to create a plastic lens in the coming steps. Make a new layer above the second layer.
4.Now keeping the new layer active, select rounded rectangle tool in 'fill' mode with a radius of around 30 and foreground color as gray(i have choosen #b1b1b1), draw a rounded rectangle like shown in the picture. ( i have hidden the two image layers below to make it more visible)
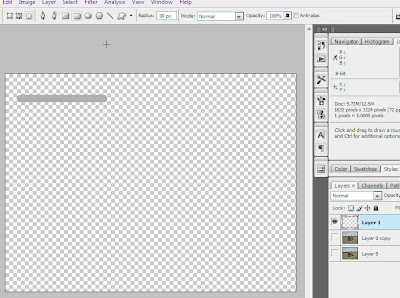
5. Next create a new layer above (name it as lens layer) and use elliptical marquee tool to draw a circle (hold shift after started drawing to make it a circle and hold 'spacebar' and move using move to adjust its position ) like shown below.
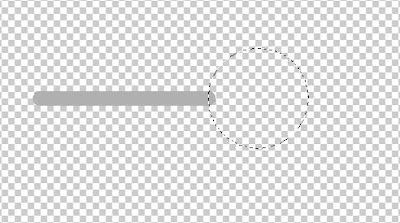
6. Now we have to draw a inner circle within this. So using the same elliptical marquee tool, hold 'alt' (or select 'subtract from selection' mode in options bar above) and draw an inner circle like shown below .
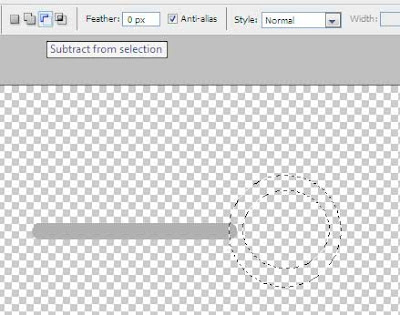
7. Keeping this selection active, fill this circle with that same gray foreground color used before (in my case it is #b1b1b1).
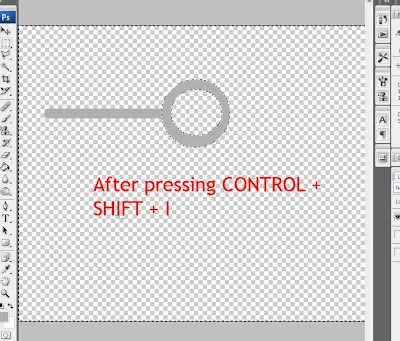
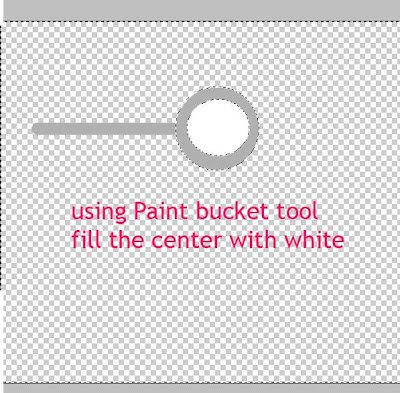
8.Keeping the selection active, press 'CONTROL + SHIFT + I ' to invert the selection and fill the center part of the lens with white color(#ffffff) like shown below.
9.Immediately after filling with white, without doing anything, just go to 'Edit --> Fade Paint Bucket Tool ' and set the opacity level to around 15 percent like shown below
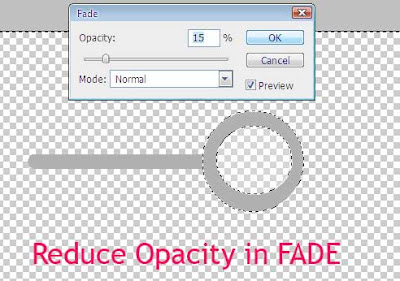
This fading is to achieve that transparency effect in lens.
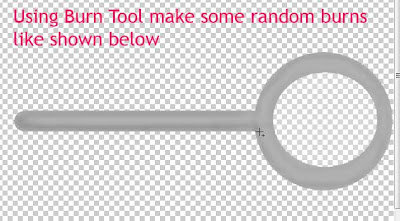
10. After deselecting the previous selections, using 'Burn tool', make some burns in the lens we have created like shown below.
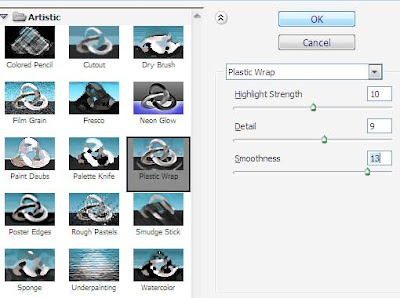
11. Now select 'Filter --> Artistic --> Plastic Wrap' in the menu bar and use the settings like shown below.
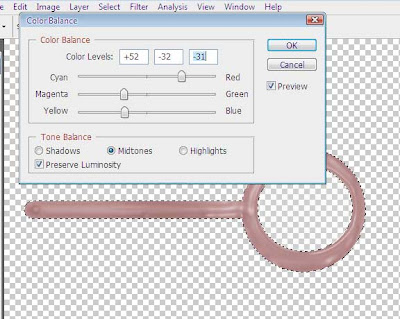
I have changed the color of this plastic lens using 'color balance' palette like shown below.
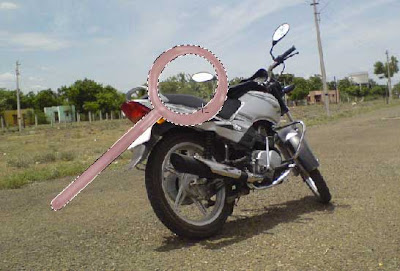
12. Thus we have a plastic lens ready now,turn on the visibility of background image layer and rotated lens using free transform like shown below.
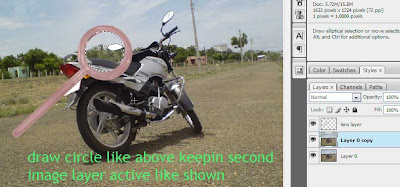
13. This step is somewhat tricky to do.. Making the bike image below lens layer as active, select elliptical marquee tool (in new selection mode) and draw a circle slightly below the inner white part of lens. After doing this, the inner part of lens will get selected. These are explained in steps below
14. Keeping this selection active, the next step is to apply magnification effect using spherize filter. Select 'Filter --> Distort --> Spherize '
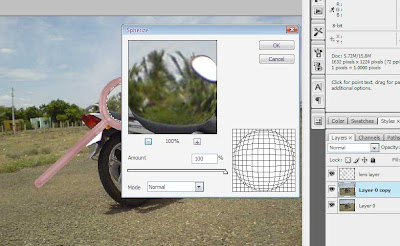
15.Thus we got magnified effect. We can increase the magnification by applyin spherize keeping the inner selection active. I have applied it second time with a 'Amount' value of 5 and got the picture like shown below.
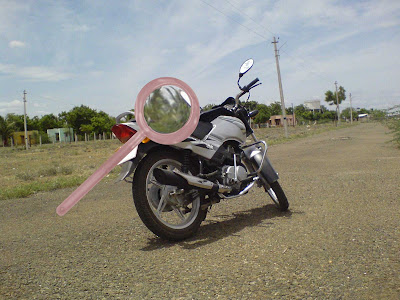
And thus we created a plastic lens from scratch and created a magnifying glass effect using photoshop.
1. Open some picture in photoshop like shown below and make it a layer by double clicking on it and give it a name.

2. To make things safe, make a duplicate of that layer so that we can work on this layer later.
3. Now we are going to create a plastic lens in the coming steps. Make a new layer above the second layer.
4.Now keeping the new layer active, select rounded rectangle tool in 'fill' mode with a radius of around 30 and foreground color as gray(i have choosen #b1b1b1), draw a rounded rectangle like shown in the picture. ( i have hidden the two image layers below to make it more visible)

5. Next create a new layer above (name it as lens layer) and use elliptical marquee tool to draw a circle (hold shift after started drawing to make it a circle and hold 'spacebar' and move using move to adjust its position ) like shown below.

6. Now we have to draw a inner circle within this. So using the same elliptical marquee tool, hold 'alt' (or select 'subtract from selection' mode in options bar above) and draw an inner circle like shown below .

7. Keeping this selection active, fill this circle with that same gray foreground color used before (in my case it is #b1b1b1).

8.Keeping the selection active, press 'CONTROL + SHIFT + I ' to invert the selection and fill the center part of the lens with white color(#ffffff) like shown below.

9.Immediately after filling with white, without doing anything, just go to 'Edit --> Fade Paint Bucket Tool ' and set the opacity level to around 15 percent like shown below

This fading is to achieve that transparency effect in lens.
10. After deselecting the previous selections, using 'Burn tool', make some burns in the lens we have created like shown below.

11. Now select 'Filter --> Artistic --> Plastic Wrap' in the menu bar and use the settings like shown below.

I have changed the color of this plastic lens using 'color balance' palette like shown below.

12. Thus we have a plastic lens ready now,turn on the visibility of background image layer and rotated lens using free transform like shown below.

13. This step is somewhat tricky to do.. Making the bike image below lens layer as active, select elliptical marquee tool (in new selection mode) and draw a circle slightly below the inner white part of lens. After doing this, the inner part of lens will get selected. These are explained in steps below

14. Keeping this selection active, the next step is to apply magnification effect using spherize filter. Select 'Filter --> Distort --> Spherize '

15.Thus we got magnified effect. We can increase the magnification by applyin spherize keeping the inner selection active. I have applied it second time with a 'Amount' value of 5 and got the picture like shown below.

And thus we created a plastic lens from scratch and created a magnifying glass effect using photoshop.


